How to Create a Custom Stylesheet for Wygwam in ExpressionEngine
Whoa, Wygwam, where’d you get all that style? The answer is from you. All us Wygwam-lovers know we can control the styles that appear in the Styles drop-down menu on Wygwam's toolbar, but actually doing it is another story. All it takes is a small javascript file and a few changes to Wygwam's config settings.
Before You Start
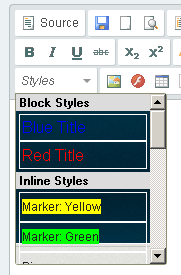
Make sure your site's default stylesheet is working properly so Wygwam can reference it. Notice, before you change anything, the default Styles drop-down menu looks like this:

Four easy steps. Ready?
1. Prepare
Make a quick list of the css rules you want in the Styles drop-down menu. I like to include all the basics like p, H1, H2, H3, any special id’s or classes, and image captions – yes, you can create image captions in Wygwam (coming soon!).
2. Create the Custom JavaScript File
Copy and paste the following code into a new file and name it mystyles.js:
CKEDITOR.addStylesSet( 'my_styles',
[
     // Block Styles – address, div, h1, h2, h3, h4, h5, h6, p and pre
     { name : 'Paragraph', element : 'p' },
     { name : 'Heading 1', element : 'h1' },
     { name : 'Heading 2', element : 'h2' },
     { name : 'Heading 3', element : 'h3' },
     { name : 'Heading 4', element : 'h4' },
     { name : 'Heading 5', element : 'h5' },
     { name : 'Heading 6', element : 'h6' },

     // Object Styles – a, embed, hr, img, li, object, ol, table, td, tr and ul

     // Inline Styles – spans and special classes and ids
     { name : 'Highlight Yellow', element : 'span', attributes : { 'class' : 'highlight' } },
     { name : 'Large Text', element : 'span', attributes : { 'class' : 'large' } },
     { name : 'Small Text', element : 'span', attributes : { 'class' : 'small' } }
]);
The objects in the above code reference your existing stylesheet, so alter it to display only the styles you want appear in the Styles drop-down menu. As an example, Highlight Yellow is a label that appears when the drop-down menu is clicked from the toolbar. If you highlight text in the editor and select this style, a <span> tag is wrapped around your selection and given a class of highlight. The class highlight refers to the properties in your default stylessheet for that class.
Below are notes from the Pixel & Tonic's site for extra help:
- name
- The name that will appear within the Styles menu
- element
- The element your selection will be converted to (or wrapped by, in the case of “span”) if the style is selected
- styles (optional)
- CSS styles that will be applied directly to the element
- attributes (optional)
- Any other attributes to be added to the element (i.e. “class”)
3. Upload the JavaScript File to Your Server
You can upload your javascript file where it's easiest for you to reference. Here's a sample file path:
system/expressionengine/third-party/wygwam/styles/mystyles.js
4. Edit Wygwam Config Settings
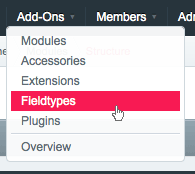
From ExpressionEngine, go to Add-ons > Field Types > Wygwam.

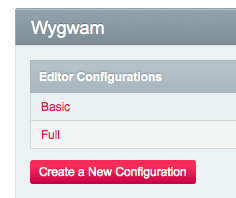
Choose the Editor Configuration you’d like to edit:

When the new edit screen appears, choose “stylesSet” from the “Add an advanced setting…” drop-down menu near the bottom of the page:

When the text input field appears to the right, type this in:
my_styles:/system/expressionengine/third_party/wygwam/styles/mystyles.js

You're Done!
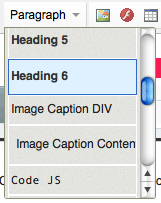
Click Update to save your changes then edit a page that utilizes Wygwam. Click the Styles drop-down menu and the default styles will be replaced by the ones you just uploaded to your server:

Did you enjoy this article?
Then subscribe to our emails and you’ll receive our latest insights.
Written By:
Panayiotis Karabetis
